How To Add SEO Friendly Blog Post Title

How To Add SEO Friendly Blog Post Title

Today i am going to share to share how to add a search engine friendly blogger blog post title and blog title. Default blog title and post title are not SEO friendly. The Page title is the most important element in your blog in terms of higher ranking in search results. Here is one example blog post title first and after blog title.

How To Add SEO Friendly Blog Post Title


Google only displays 70 characters on Google search results and in case of Yahoo display bit more.So your blog posts will not display or you will not get as much rank in Search Results.

Follow These Steps:


  • Goto blogger dashboard
  • Template >> Edti Html
  • Now find this code
<title><data:blog.pageTitle/></title>
Replace the above code with the following below code.

<b:if cond='data:blog.pageType == &quot;index&quot;'>
<title><data:blog.pageTitle/></title>
<b:else/>
<title><data:blog.pageName/> - Info Blog Maz</title>
</b:if>

Replace the red blog text with your own blog title
Now save the template you have done if you need any help please leave a comment below stay tuned.

Google Official Contact Form for Static Pages in Blogger

Google Official Contact Form for Static Pages in Blogger

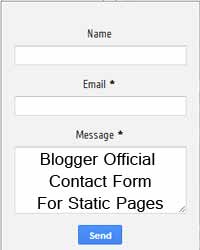
Google released a official contact form but its only work on sidebar and widgets but i am shairng this with a tricks to add like a contact us static page.

Add Blogger Official Contact Form To Static Pages

  • Go to Blogger Dashboard
  • Pages >> New Page >> Blank Page
  • Switch to Edit Html
  • and paste the following codes below
<table><tbody><tr><td>Name</td> <td><input class="contact-form-name" id="ContactForm1_contact-form-name" name="name" size="30" type="text" value="" /></td></tr><tr> <td>Email<span style="font-weight: bolder;">*Mandatory</span></td><td><input class="contact-form-email" id="ContactForm1_contact-form-email" name="email" size="30" type="text" value="" /></td></tr><tr> <td>Message<span style="font-weight: bolder;">*Mandatory</span></td><td><textarea class="contact-form-email-message" cols="25" id="ContactForm1_contact-form-email-message" name="email-message" rows="5"></textarea></td></tr><tr><td align="center" colspan="2"><input class="contact-form-button contact-form-button-submit" id="ContactForm1_contact-form-submit" type="button" value="Send" /></td></tr><tr><td align="center" colspan="2"><div style="max-width: 222px; text-align: center; width: 100%;"><div class="contact-form-error-message" id="ContactForm1_contact-form-error-message"></div><div class="contact-form-success-message" id="ContactForm1_contact-form-success-message"></div></div></td></tr></tbody></table>


  • Now click Publish


Then,


  • Go to template
  • Edit html >> expand widgets 
  • Click on Jump to Widget and take Contact Form1

Click on the arrow before


<b:widget id='ContactForm1' locked='false' title=' Contact Us' type='ContactForm'>
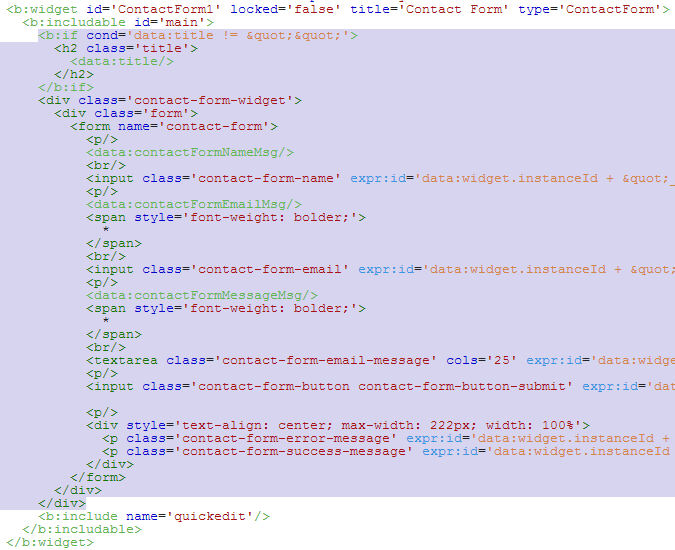
Delete the portion inside <b:includable id='main'> ........ </b:includable>


  • Now Sidebar Widget will not appear.
  • Click on Save Template
Now You Have done if you need any help please comments below.


How To Add Page Navigation To Blogger Blog

After my previous artilces about How to change head image on reload on blogger blog today i am going to share how to add beautiful page navigation to blogger blog in simple step and ways.


Adding Page Navigation:

  • Go to blogger dasboard
  • Layout >> Add a Gadget >> Html/Javascript
  • Paste and following codes

<style type='text/css'>
#blog-pager{height: 28px;
    padding: 10px 0 0;
overflow:hidden;
text-align:center;
}
.showpageArea a {text-decoration:underline;
font-size: 16px;
       text-align: center;}
.showpageNum a {font-size:16px;text-decoration:none;border: 1px solid #cccccc;margin:0 5px;padding:5px;}
.showpageNum a:hover {border: 1px solid #cccccc;background-color:#cccccc;}
.showpagePoint {font-size:16px;text-decoration:none;border: 1px solid #cccccc;background: #216FD9;margin:0 5px;padding:5px;color:#ffffff;}
.showpageOf {text-decoration:none;padding:5px;margin: 0 5px;}
.showpage a {text-decoration:none;border: 1px solid #cccccc;padding:5px;}
.showpage a:hover {text-decoration:none;background: #cccccc;}
.showpageNum a:link,.showpage a:link {text-decoration:none;color:#333333;}</style>
<script style='text/javascript'>var pageCount=7;
var displayPageNum=5;var upPageWord="Previous";var downPageWord="Next";</script><a href="http://winappsfree.blogspot.com" style="font-size:0pt">Grab This!</a>
<script style='text/javascript' src='http://netoopscodes.googlecode.com/svn/netoops-page-nav-v2.js'></script>


  • Now Save.
You have done if you need any help about this widget please comment below will comments will highly appreciate.Thanks and stay tuned!

Head Banner Changing Image Tricks For Blogger

Head Banner Changing Image Tricks For Blogger
Hi Friends, Today i am sharing this articles how to change head image on reload the tab on blogger blog this is very simple and interesting.


Follow These Instruction:

Go to Blogger Dashboard
Template >> Edit Html >> Expand Widgets
Find  ]]></b:skin> and pase the following code before it.

#header {
background: url("your header image url in quotes") no-repeat left bottom;
margin:0;
padding:2px;
}

Then copy the following script and paste then above </head> tag.

<script type="text/javascript">
var banner= new Array();
banner[0]="1st image url";
banner[1]="2nd image url";
banner[2]="3rd image url";
banner[3]="4th image url";
banner[4]="5th image url";
var random=Math.round(4*Math.random());
document.write("<style>");
document.write("#header {");
document.write(' background:url("' + banner[random] + '") no-repeat left TOP;');
document.write(" }");
document.write("</style>");
</script>

 If you face any problem please feel free to leave a comment your reply will be highly appreciate thanks and stay tuned.

Highlight Author Comments in Blogger in threaded comment System

Highlight Author Comments in Blogger in threaded comment System

Today i am sharing hwo to high light Author comments in blogger. Comments are the best way to make good relation ship with visitor they are highly inspire if author reply there comments by continuely. as well as comment system is also very helpfull for better SEO and Blog health.

How To Highlight Author Comments In Blogger

  • Sign In to Blogger Dashboard
  • Go to Template -> Edit HTML
  • Find </body> and copy the following code above it

<script type="text/javascript">
    $(function() {
      function highlight(){
        $(&#39;.user.blog-author,.ssyby&#39;).closest(&#39;.comment-block&#39;)
          .css(&#39;border&#39;, &#39;1px solid #e1e1e1&#39;)
          .css(&#39;background&#39;,&#39;#f1f1f1 url(&quot;https://blogger.googleusercontent.com/img/b/R29vZ2xl/AVvXsEiVNG672IXXAVYS9N8s8t8NLty_9J0yArttDc9XgiVINl9oM_qw8ZAEx9d44HZJoRwo7TjZyr8BNsvEqHPxDcV5NfVQhwl19FiHqbE-M_zXUBNwAEn0aoSt_7KlDjv46NljRQyV7Vk5tHg/s1600/admin_comment1.png&quot;) no-repeat bottom right&#39;)
          .css(&#39;padding&#39;, &#39;10px&#39;);
          }
          $(document).bind(&#39;ready scroll click&#39;, highlight);
                       });</script><a style="display:none" href="http://winappsfree.blogspot.com">Blogger Widgets</a>
  • Click Save.
Congratulations you are done. Please share this articles with you friend and stay tuned more Tips and widgets are waiting for you.

Author-Box with Social Connection

Author-Box with Social Connection


Are you looking for an attractive author bio widget? Then today, you are at right place. It is quite common that every reader will be eager to know the man behind an article if it is really interesting. So the first thing any reader will do after reading such a wonderful article, is scrolling throughout the blog to find the author.

How to add an author bio widget in Blogger.

Step 1: Find the code


The best place to add an author bio widget is below the article that the author had written. So, first of all, go to Blogger dashboard >> Template >> Edit HTML and find below HTML code (to find code, just click anywhere on the HTML editor and press ctrl+f).

<div class='post-footer-line post-footer-line-1'>

Author-Box with Social Connection

Remember, the code that I have mentioned earlier is repeated two times in your template. So find the code (<div class='post-footer-line post-footer-line-1'>) which is seen below this code - <div class='post-footer'>

Step 2: Place the code


Now you need to the place the following code below the code that I have mentioned earlier. 

<div class='ts-fab-wrapper ts-fab-icons-text' id='ts-fab-below-10105'><ul class='ts-fab-list'><li class='ts-fab-bio-link active'><a href='#ts-fab-bio-below-10105'>About</a></li><li class='ts-fab-twitter-link'><a href='#ts-fab-twitter-below-10105'>Twitter</a></li><li class='ts-fab-facebook-link'><a href='#ts-fab-facebook-below-10105'>Facebook</a></li><li class='ts-fab-googleplus-link'><a href='#ts-fab-googleplus-below-10105'>Google+</a></li></ul>
<div class='ts-fab-tabs'>
<div class='ts-fab-tab' id='ts-fab-bio-below-10105' style='display: block;'>
<div class='ts-fab-avatar'><img alt='' class='avatar avatar-64 photo grav-hashed grav-hijack thinglinkFiltered' height='64' id='grav-767b2f7561851b6132fed7bfe5e54d98-0' src='AUTHOR IMAGE URL HERE' width='64'/></div>
<div class='ts-fab-text'>
<div class='ts-fab-header'><h4><a href='AUTHOR WEBSITE LINK HERE'>AUTHOR NAME HERE</a></h4></div> <div class='ts-fab-content'>AUTHOR BIO HERE</div>
</div>
</div>
<div class='ts-fab-tab' id='ts-fab-twitter-below-10105' style='display: none;'>
<div class='ts-fab-avatar'><img alt='' class='avatar avatar-64 photo grav-hashed grav-hijack thinglinkFiltered' height='64' id='grav-767b2f7561851b6132fed7bfe5e54d98-1' src='AUTHOR IMAGE URL' style='' width='64'/></div>
<div class='ts-fab-text'>
<div class='ts-fab-header'>
<h4><a href='http://twitter.com/AUTHOR TWITTER PROFILE ID'>@AUTHOR NAME</a></h4></div> <div class='ts-fab-content'> </div><div class='ts-fab-follow'><iframe allowtransparency="true" frameborder="0" scrolling="no" src="http://platform.twitter.com/widgets/follow_button.1374787011.html#_=1375013320942&amp;id=twitter-widget-2&amp;lang=en&amp;screen_name=AUTHOR TWITTER PROFILE ID&amp;show_count=true&amp;show_screen_name=true&amp;size=m" class="twitter-follow-button twitter-follow-button" title="Twitter Follow Button" data-twttr-rendered="true" style="width: 243px; height: 20px;"></iframe></div>
</div>
</div>
<div class='ts-fab-tab' id='ts-fab-facebook-below-10105' style='display: none;'>
<div class='ts-fab-avatar'><img alt='' class='avatar avatar-64 photo grav-hashed grav-hijack thinglinkFiltered' height='64' id='grav-767b2f7561851b6132fed7bfe5e54d98-2' src='AUTHOR IMAGE URL' style='' width='64'/></div>
<div class='ts-fab-text'>
<div class='ts-fab-header'>
<h4><a href='http://www.facebook.com/AUTHOR FACEBOOK ID'>AUTHOR NAME</a></h4></div>
<div class='fb-follow' data-href='https://www.facebook.com/AUTHOR FACEBOOK ID' data-show-faces='true' data-width='450'><span style='height: 35px; width: 450px;'><iframe allowTransparency='true' frameborder='0' scrolling='no' src='//www.facebook.com/plugins/follow.php?href=https%3A%2F%2Fwww.facebook.com%2FAUTHOR FACEBOOK ID&amp;layout=standard&amp;show_faces=true&amp;colorscheme=light&amp;font&amp;width=450&amp;height=27' style='border:none; overflow:hidden; width:450px; height:27px;'/></span></div>
</div>
</div>
<div class='ts-fab-tab' id='ts-fab-googleplus-below-10105' style='display: none;'>
<div class='ts-fab-avatar'><img alt='' class='avatar avatar-64 photo grav-hashed grav-hijack thinglinkFiltered' height='64' id='grav-767b2f7561851b6132fed7bfe5e54d98-3' src='AUTHOR IMAGE URL' style='' width='64'/></div>
<div class='ts-fab-text'>
<div class='ts-fab-header'>
<h4><a href='https://plus.google.com/AUTHOR GOOGLE+ ID?rel=author'>AUTHOR NAME</a></h4>
</div>
<div class='g-follow' data-annotation='bubble' data-height='20' data-href='//plus.google.com/AUTHOR GOOGLE+ ID' data-rel='author'/>
</div>
</div>
</div>
</div>
<style>
.ts-fab-wrapper {
    margin: 0 0 2em;
    clear: both;
    }
.ts-fab-wrapper ul
    {
list-style:none outside none;
    }
.ts-fab-wrapper a {
    text-decoration: none !important;
    }
.ts-fab-wrapper img {
    border: none !important;
    }
.ts-fab-list {
    overflow: hidden;
    padding: 0 0 0 5px !important;
    margin: 0 !important;
    }
.ts-fab-list li {
    display: block;
    float: left;
    list-style: none;
    margin: 0 5px 0 0 !important;
    }
.ts-fab-list li a {
    display: block;
    line-height: 16px;
    height: 16px;
    padding: 8px 12px;
    background-color: #e9e9e9;
    border: 1px solid #e9e9e9;
    border-bottom: none !important;
    text-decoration: none;
    font-size: 13px;
    color: #333;
    font-weight: bold;
    outline: 0;
    text-shadow: none !important;
    -moz-border-radius: 5px 5px 0 0;
    -webkit-border-radius: 5px 5px 0 0;
    border-radius: 5px 5px 0 0;
    }
.ts-fab-list li a:hover {
    color: #333;
    }
.ts-fab-list li.active a {
    background-color: #333;
    color: #fff;
    border-color: #333;
    }
.ts-fab-list li a {
    background-image: url('http://www.steamfeed.com/wp-content/plugins/fanciest-author-box_10-13-12/images/fab_tab_icons.png');
    }
.ts-fab-list li.ts-fab-bio-link a {
    background-position: 8px 8px;
    background-repeat: no-repeat;
    padding-left: 27px;
    }
.ts-fab-list li.ts-fab-bio-link.active a {
    background-position: -280px 8px;
    background-repeat: no-repeat;
    padding-left: 27px;
    }
.ts-fab-list li.ts-fab-twitter-link a {
    background-position: 8px -42px;
    background-repeat: no-repeat;
    padding-left: 35px;
    }
.ts-fab-list li.ts-fab-twitter-link.active a {
    background-position: -270px -42px;
    background-repeat: no-repeat;
    padding-left: 35px;
    }
.ts-fab-list li.ts-fab-facebook-link a {
    background-position: 8px -92px;
    background-repeat: no-repeat;
    padding-left: 23px;
    }
.ts-fab-list li.ts-fab-facebook-link.active a {
    background-position: -284px -92px;
    background-repeat: no-repeat;
    padding-left: 23px;
    }
.ts-fab-list li.ts-fab-googleplus-link a {
    background-position: 8px -142px;
    background-repeat: no-repeat;
    padding-left: 30px;
    }
.ts-fab-list li.ts-fab-googleplus-link.active a {
    background-position: -276px -142px;
    background-repeat: no-repeat;
    padding-left: 30px;
    }
.ts-fab-list li.ts-fab-linkedin-link a {
    background-position: 8px -242px;
    background-repeat: no-repeat;
    padding-left: 30px;
    }
.ts-fab-list li.ts-fab-linkedin-link.active a {
    background-position: -276px -242px;
    background-repeat: no-repeat;
    padding-left: 30px;
    }
.ts-fab-custom-link a {
    background-image: none !important;
    }
.ts-fab-widget .ts-fab-list li a, .ts-fab-icons-only .ts-fab-list li a {
    text-indent: -9999em;
    padding: 8px 12px !important;
    }
.ts-fab-widget .ts-fab-list li.ts-fab-bio-link a, .ts-fab-icons-only .ts-fab-list li.ts-fab-bio-link a {
    width: 4px;
    }
.ts-fab-widget .ts-fab-list li.ts-fab-twitter-link a, .ts-fab-icons-only .ts-fab-list li.ts-fab-twitter-link a {
    width: 12px;
    }
.ts-fab-widget .ts-fab-list li.ts-fab-googleplus-link a, .ts-fab-icons-only .ts-fab-list li.ts-fab-googleplus-link a {
    width: 8px;
    }
.ts-fab-widget .ts-fab-list li.ts-fab-linkedin-link a, .ts-fab-icons-only .ts-fab-list li.ts-fab-linkedin-link a {
    width: 8px;
    }
.ts-fab-widget .ts-fab-list li.ts-fab-facebook-link a, .ts-fab-icons-only .ts-fab-list li.ts-fab-facebook-link a {
    width: 0;
    }
.ts-fab-widget .ts-fab-list li.ts-fab-latest-posts-link a, .ts-fab-icons-only .ts-fab-list li.ts-fab-latest-posts-link a {
    width: 4px;
    }
.ts-fab-widget .ts-fab-list li.ts-fab-custom-link a, .ts-fab-icons-only .ts-fab-list li.ts-fab-custom-link a {
    text-indent: 0 !important;
    }
.ts-fab-tab {
    display: none;
    border: 2px solid #333;
    padding: 12px;
    background: #fff;
    min-height: 64px;
    overflow: hidden;
    }
.ts-fab-tab:first-child {
    display: block;
    }
.ts-fab-widget .ts-fab-tab {
    padding: 8px;
    }
.ts-fab-avatar {
    display: block;
    float: left;
    width: 64px;
    height: 64px;
    }
.ts-fab-no-float .ts-fab-avatar {
    float: none;
    margin: 0 0 12px;
    }
.ts-fab-avatar img {
    display: block;
    border: none !important;
    }
.ts-fab-text {
    margin-left: 76px;
    line-height: 1.5;
    }
.ts-fab-no-float .ts-fab-text {
    margin-left: 0;
    }
.ts-fab-header {
    margin-bottom: 10px;
    }
.ts-fab-text h4 {
    clear: none;
    font-size: 18px;
    line-height: 1 !important;
    font-weight: bold;
    margin: 0 0 0.2em !important;
    line-height: 1;
    padding: 0;
    }
.ts-fab-description {
    font-size: 12px
    }
.ts-fab-follow {
    margin-top: 10px;
    }
.ts-fab-latest {
    margin: 0 !important;
    padding: 0 !important;
    }
.ts-fab-latest li {
    list-style: none !important;
    line-height: 1.1;
    margin: 0 0 0.6em !important
    }
.ts-fab-latest li span, .ts-fab-twitter-time {
    font-size: 12px;
    }
.latest-see-all {
    font-weight: normal;
    }
.ts-fab-wrapper iframe {
    margin-bottom: 0 !important;
    }
body.rtl .ts-fab-avatar {
    float: right;
    }
body.rtl .ts-fab-text {
    margin-left: 0;
    margin-right: 76px;
    }
body.rtl .ts-fab-list {
    padding: 0 5px 0 0 !important;
    }
body.rtl .ts-fab-list li {
    float: right;
    margin: 0 0 0 5px !important;
    }
</style>

 Step 3: Place the script


Now search for this code </head> and place the following script above it.
<script type="text/javascript">
/*<![CDATA[*/
jQuery(document).ready(function(a){a(".ts-fab-tabs > div").hide();a(".ts-fab-tabs > div:first-child").show();a(".ts-fab-list li:first-child").addClass("active");a(".ts-fab-list li a").click(function(){a(this).closest(".ts-fab-wrapper").find("li").removeClass("active");a(this).parent().addClass("active");var b=a(this).attr("href");if(b.indexOf("#")!=-1){currentTabExp=b.split("#");b="#"+currentTabExp[1]}a(this).closest(".ts-fab-wrapper").find(".ts-fab-tabs > div").hide();a(b).show();return false})});
/*]]>*/
</script>
<script type="text/javascript">
/*<![CDATA[*/
 // Twitter
 (function(a,b,c){var d=a.getElementsByTagName(b)[0];if(!a.getElementById(c)){a=a.createElement(b);a.id=c;a.src="//platform.twitter.com/widgets.js";d.parentNode.insertBefore(a,d)}})(document,"script","twitter-wjs");
 // Google + (plus)
 (function(){var a=document.createElement("script");a.type="text/javascript";a.async=true;a.src="https://apis.google.com/js/plusone.js";var b=document.getElementsByTagName("script")[0];b.parentNode.insertBefore(a,b)})();
/*]]>*/
</script>

Now click on save the template you have done customize with your own desire viewing and if you face any problem please feel free to leave a comment below your comment will be highly appreciate.

Thanks & Stay Tuned. . ! 

Top 10 Tips To Get Easily Huge Traffic


1)      TOPIC SELECTION

Topic selection is one of the most important factor affecting good traffic. Blogs with less popular and boring topics will lead to low traffic. Such blogs will not be likely to readers. So it is an important factor. You should choose a topic with wide popularity. You should have deep knowledge in that topic.

2)      INCREASE NUMBER OF POSTS

Increase number of relevant and related posts. This should be very informative and presented in an interesting way that readers get stick to it. This make readers to make your blog book marked and visit multiple times. This creates a huge range of returning visitors and your blog will be rated better and better.

3)      DESIGN AND LAYOUT

It is very important part of a blog. Blogs which looks less attractive will also lead to low traffic.  So it should have an attractive design and layout. The blog should contain a nice layout, easy to navigate interface, avoiding unwanted materials............. should be done with proper care.

4)      WAY OF PRESENTATION

The way you present your idea is also important. It should be very easy to understand for visitors. Does not require Advanced Language. But it should be in moderate language. It should not contain plenty of spelling and grammatical mistakes. You should present the topic in such a way that readers get attracted and stick to it.

5)      SOCIALIZATION

Socialization is also an important part of it. We should integrate social websites like FACEBOOK, TWITTER, GOOGLE+, LINKEDIN, ............ Social websites have a remarkable role in generating good traffic. In the beginning onwards I have noticed that a major portion of my blog’s traffic were created by them.

6)      SHARABLE POSTS

You should post sharable contents. When you post interesting, relevant, informative, popular contents,....... it make readers to share your posts in social websites and this will lead to huge traffic generation. They will leave a comment, likes your posts, and share your posts.

7)      EMAIL MARKETING


You should include an email subscription link in you blog for your blog readers to get notified on updates of your blog. Comments, new posts, ..... will be notified. Notifications will be send to their mail id and they clicks through this links and get in to your blog and thus increase your blog’s traffic substantially.

8)      SUBMIT YOUR BLOGS TO BLOG DIRECTORIES

Sub your blog to several blog directories available now. This creates a portion of visitors to your blog. You can submit your blog to free referring  sites to get some traffic. But this methods require your blog to be highly informative and useful.

9)      COMMENTS AND BACK LINKS

Commenting and creating Back links on other websites and blogs can also bring some traffic to your blog. Concentrate on commenting and creating back links on blogs and websites with huge traffic.

10)   ADVERTISING

It is the most important method to create huge traffic. You can advertise in other good traffic websites or advertisers websites in order to get traffic to your blog. This method can create huge chances of traffic. But this method also costs huge when above methods does not cost much.